


Autumn Activities
Posted on 7th October 2020 at 17:07
AUTUMN ACTIVITIES
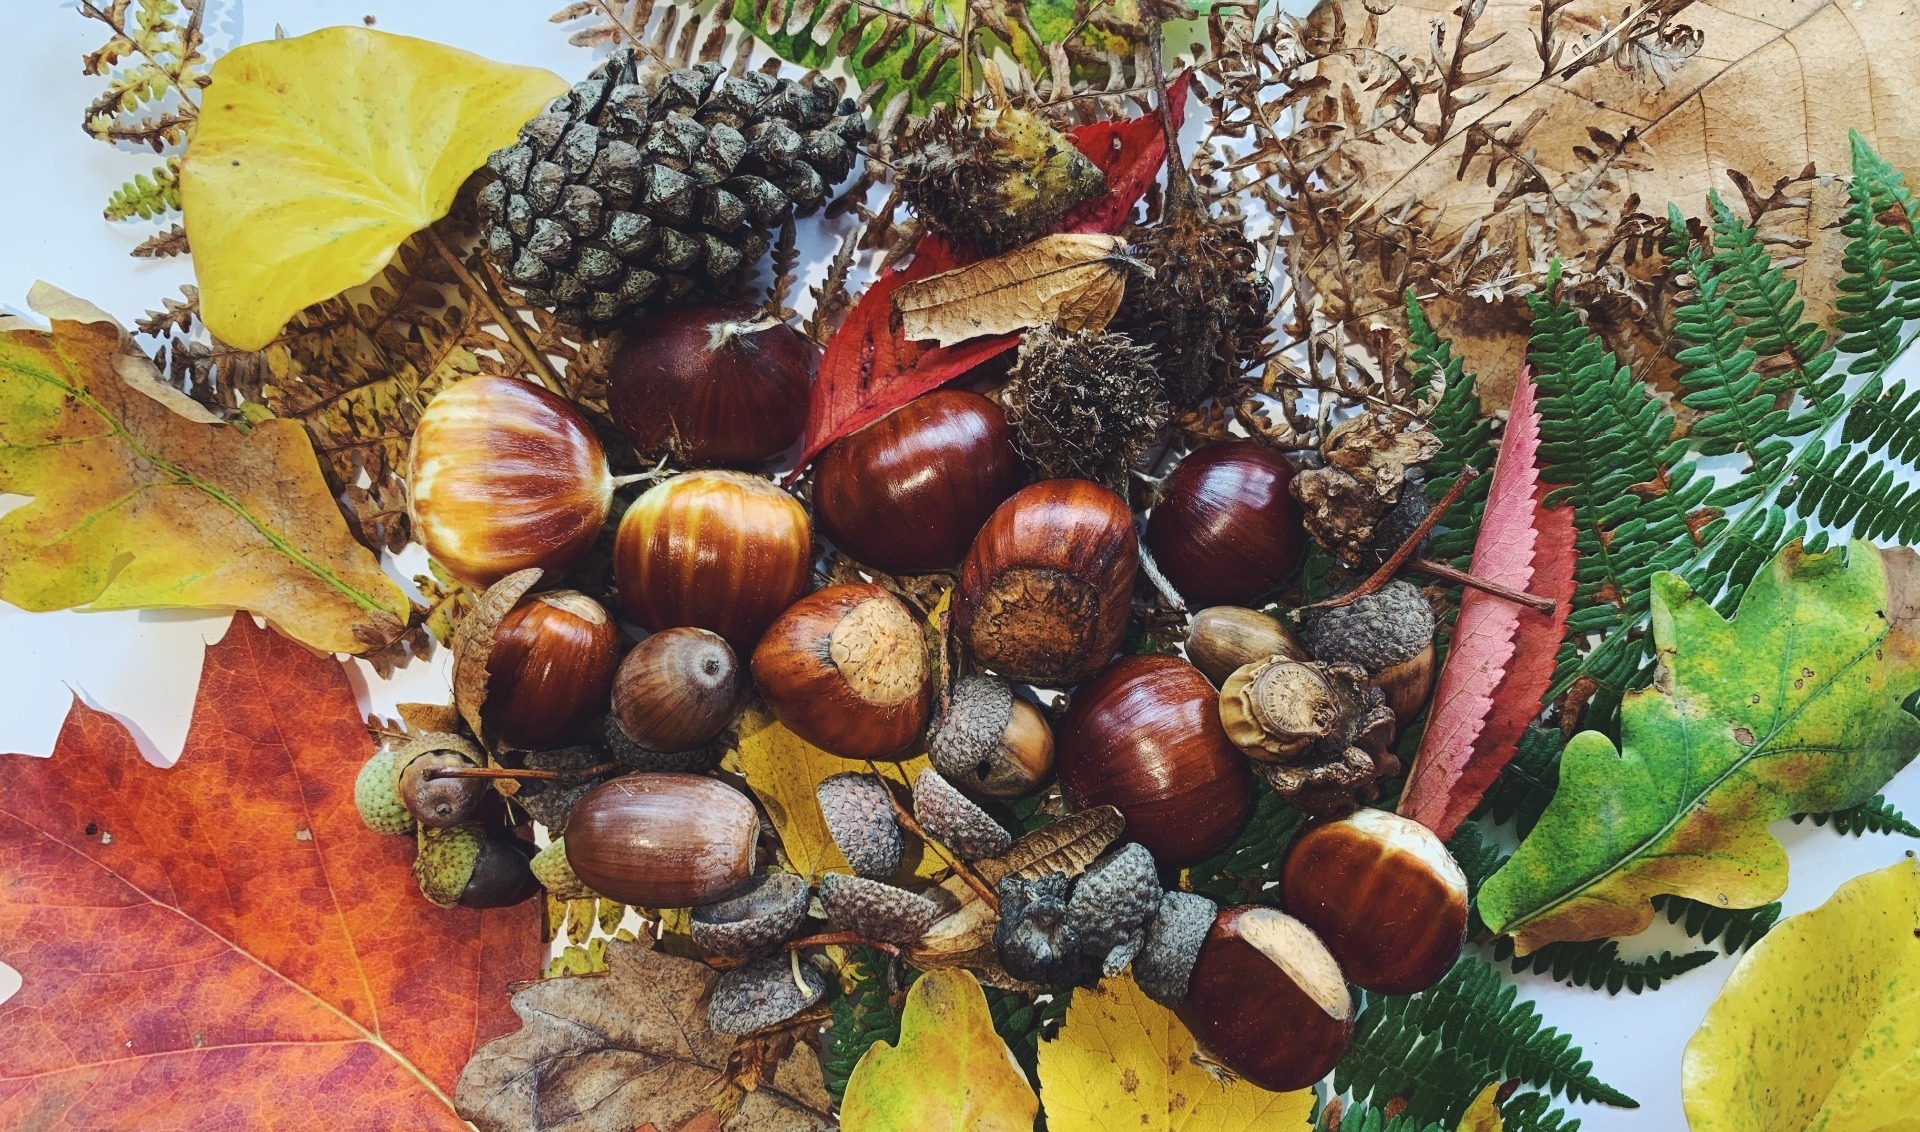
Well, Hello Autumn! Where did you creep up on us from?! After a year where staying in became the new norm for us all, there may be a good reason to venture outside this season. You would have noticed, along with all the autumnal toned leaves, is the amount of seeds scattering the grounds. We want to give you some step-by-step guides of some great autumninal activities to keep you busy this month!
PLANTING SEEDS
‘Growing a tree’ is not going to be an overnight job but it is so important for our environment to put back in what we can. Every member of the A Cut Above team are passionate about trees and although part of our job can involve removing an unhealthy or unwanted tree, we want to do all we can to replace these (and more!). Besides benefiting the environment, growing a tree from a seed is great fun and interesting – you get to watch it from the start of its life, which you have given it and who knows the height it will eventually reach. So here are two easy ones that you can try...
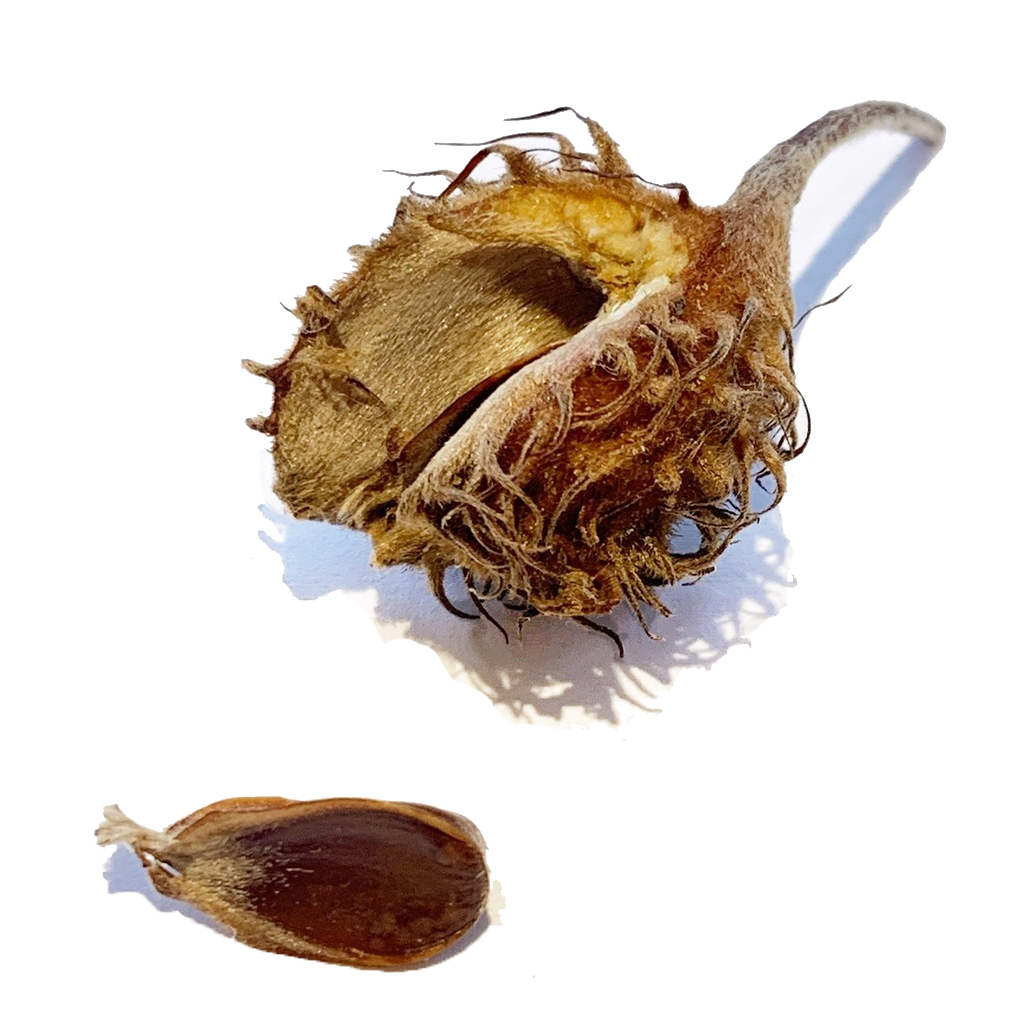
BEECH
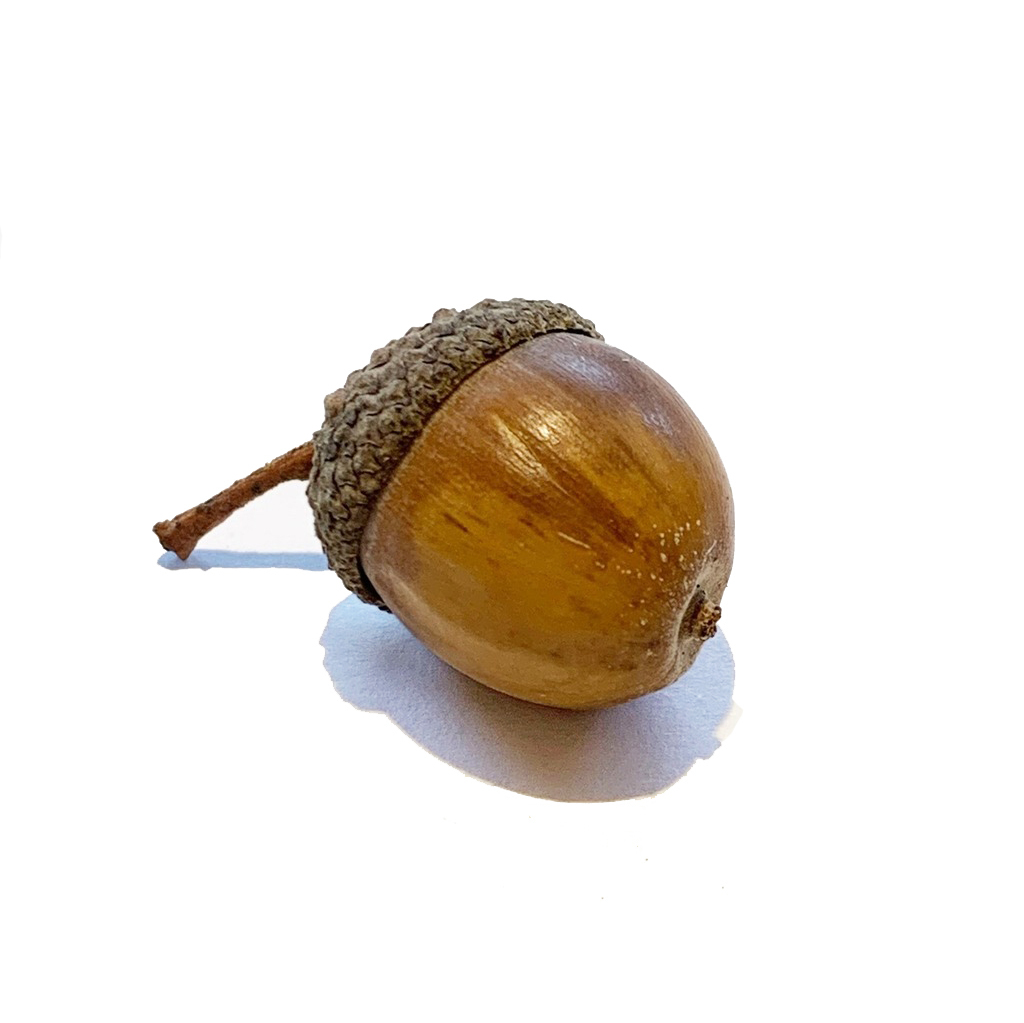
OAK
STEP 1
GATHER YOUR SEEDS!
Get outside and collect those seeds. Put your gathered seeds in a cup of water. Those that sink are viable, those that float will not germinate.
STEP 2
HELLO COMPOST!
Fill a plant pot (preferably squared) with compost. Ensure the pot has drainage holes in the base. You can also add a few small stones to the bottom of the plant pot to help with water drainage. Leave about a one-inch gap from the compost to the top of the pot.
STEP 3
INTRODUCE THE SEEDS!
Plant the seeds about 2cm deep into the compost. Push these down and cover the seeds with some more compost.
STEP 4
GIVE THEM A DRINK!
Water the plant pot thoroughly making sure all the compost is wet. Be careful not to ‘flood’ the plant pot but enough to give that seed its first thirst quench of life.
STEP 5
GET SHADY!
Location, location, location - place the pot in a shady spot, either in the garden or near a window that does not get much light. Wherever you put it, the spot should not receive constant sunlight. Seeds thrive well between a temperature of 18⁰C and 24⁰C. If outside, you will need to cover the pot with some wire mesh to protect it from hungry birds and squirrels.
STEP 6
MOTHER THAT BABY!
Check on the pot each week, keeping it watered but do not over water it. It will not be long until you see the seedlings start to appear.
STEP 7
RE-ACOMMODATE!
You should be able to judge when the tree will need to be transferred to a bigger pot or straight into the ground. You may notice the roots starting to appear out the drainage holes at the bottom of the pot. This is when it will need to be transferred into somewhere larger and sunnier. Once the tree reaches around 40cm, it is ready for the ground. When transferring the tree to another home, ensure that it is kept well-watered.
More info on this step at https://www.woodlandtrust.org.uk/plant-trees/advice/how-to-plant/
STEP 8
BE PROUD!
You’ve grown a tree! Keep patient and enjoy watching it grow and grow - it could be set for high heights!
STEP 1
GATHER YOUR SEEDS!
Get outside and collect those seeds. Find acorns in good condition that are green or brown and without holes. The caps should come off easily.
STEP 2
HELLO COMPOST!
Fill a plant pot (preferably squared) with compost. Ensure the pot has drainage holes in the base. You can also add a few small stones to the bottom of the plant pot to help with water drainage. Leave about a one-inch gap from the compost to the top of the pot.
STEP 3
INTRODUCE THE SEEDS!
Plant the seeds about 2cm deep into the compost. Push these down and cover the seeds with some more compost.
STEP 4
GIVE THEM A DRINK!
Water the plant pot thoroughly making sure all the compost is wet. Be careful not to ‘flood’ the plant pot but enough to give that seed its first thirst quench of life.
STEP 5
GET SHADY!
Location, location, location - place the pot in a shady spot, either in the garden or near a window that does not get much light. Wherever you put it, the spot should not receive constant sunlight. Seeds thrive well between a temperature of 18⁰C and 24⁰C. If outside, you will need to cover the pot with some wire mesh to protect it from hungry birds and squirrels.
STEP 6
MOTHER THAT BABY!
Check on the pot each week, keeping it watered but do not over water it. Be patient, it could be as late as Spring.
STEP 7
RE-ACOMMODATE!
You should be able to judge when the tree will need to be transferred to a bigger pot or straight into the ground. You may notice the roots starting to appear out the drainage holes at the bottom of the pot. This is when it will need to be transferred into somewhere larger and sunnier. Once the tree reaches around 40cm, it is ready for the ground. When transferring the tree to another home, ensure that it is kept well-watered.
More info on this step at https://www.woodlandtrust.org.uk/plant-trees/advice/how-to-plant/
STEP 8
BE PROUD!
You’ve grown a tree! Keep patient and enjoy watching it grow and grow - it could be set for high heights!
MAD ABOUT CHESTNUTS...
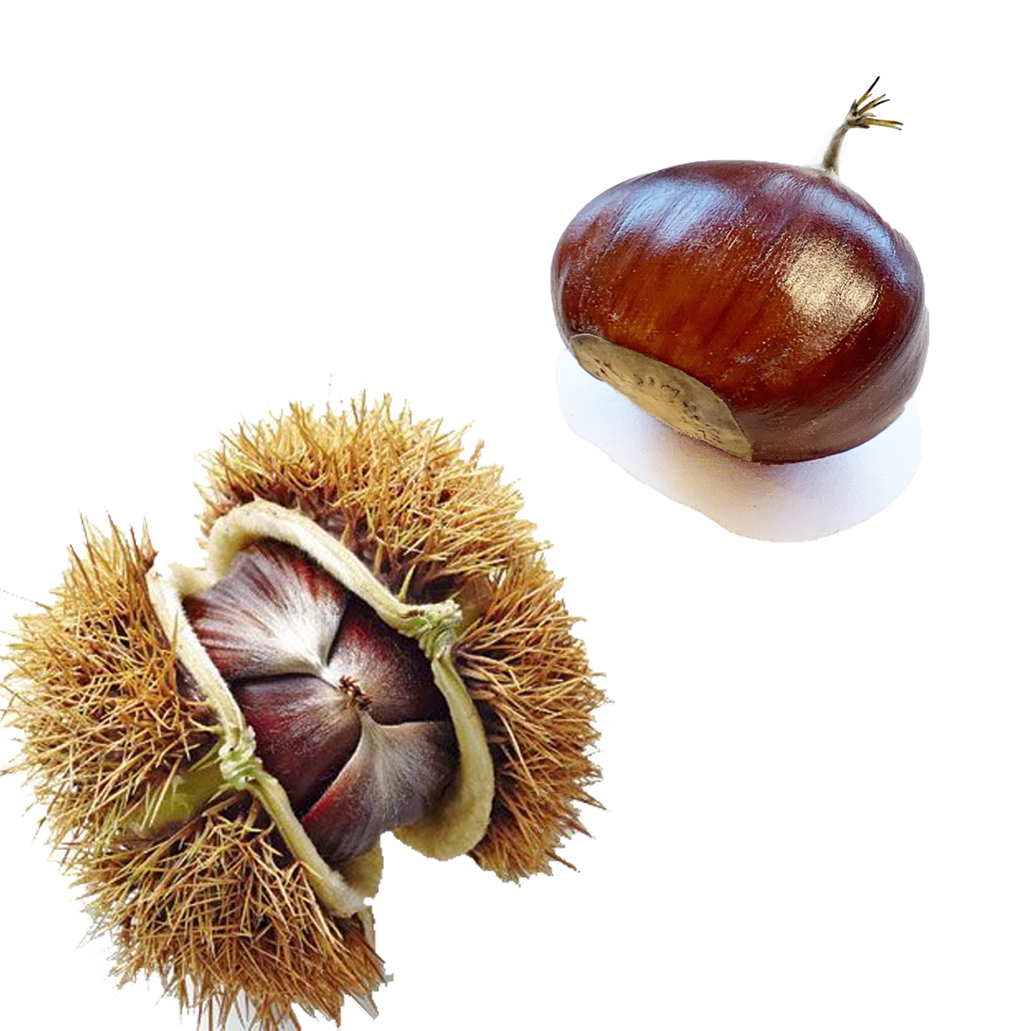
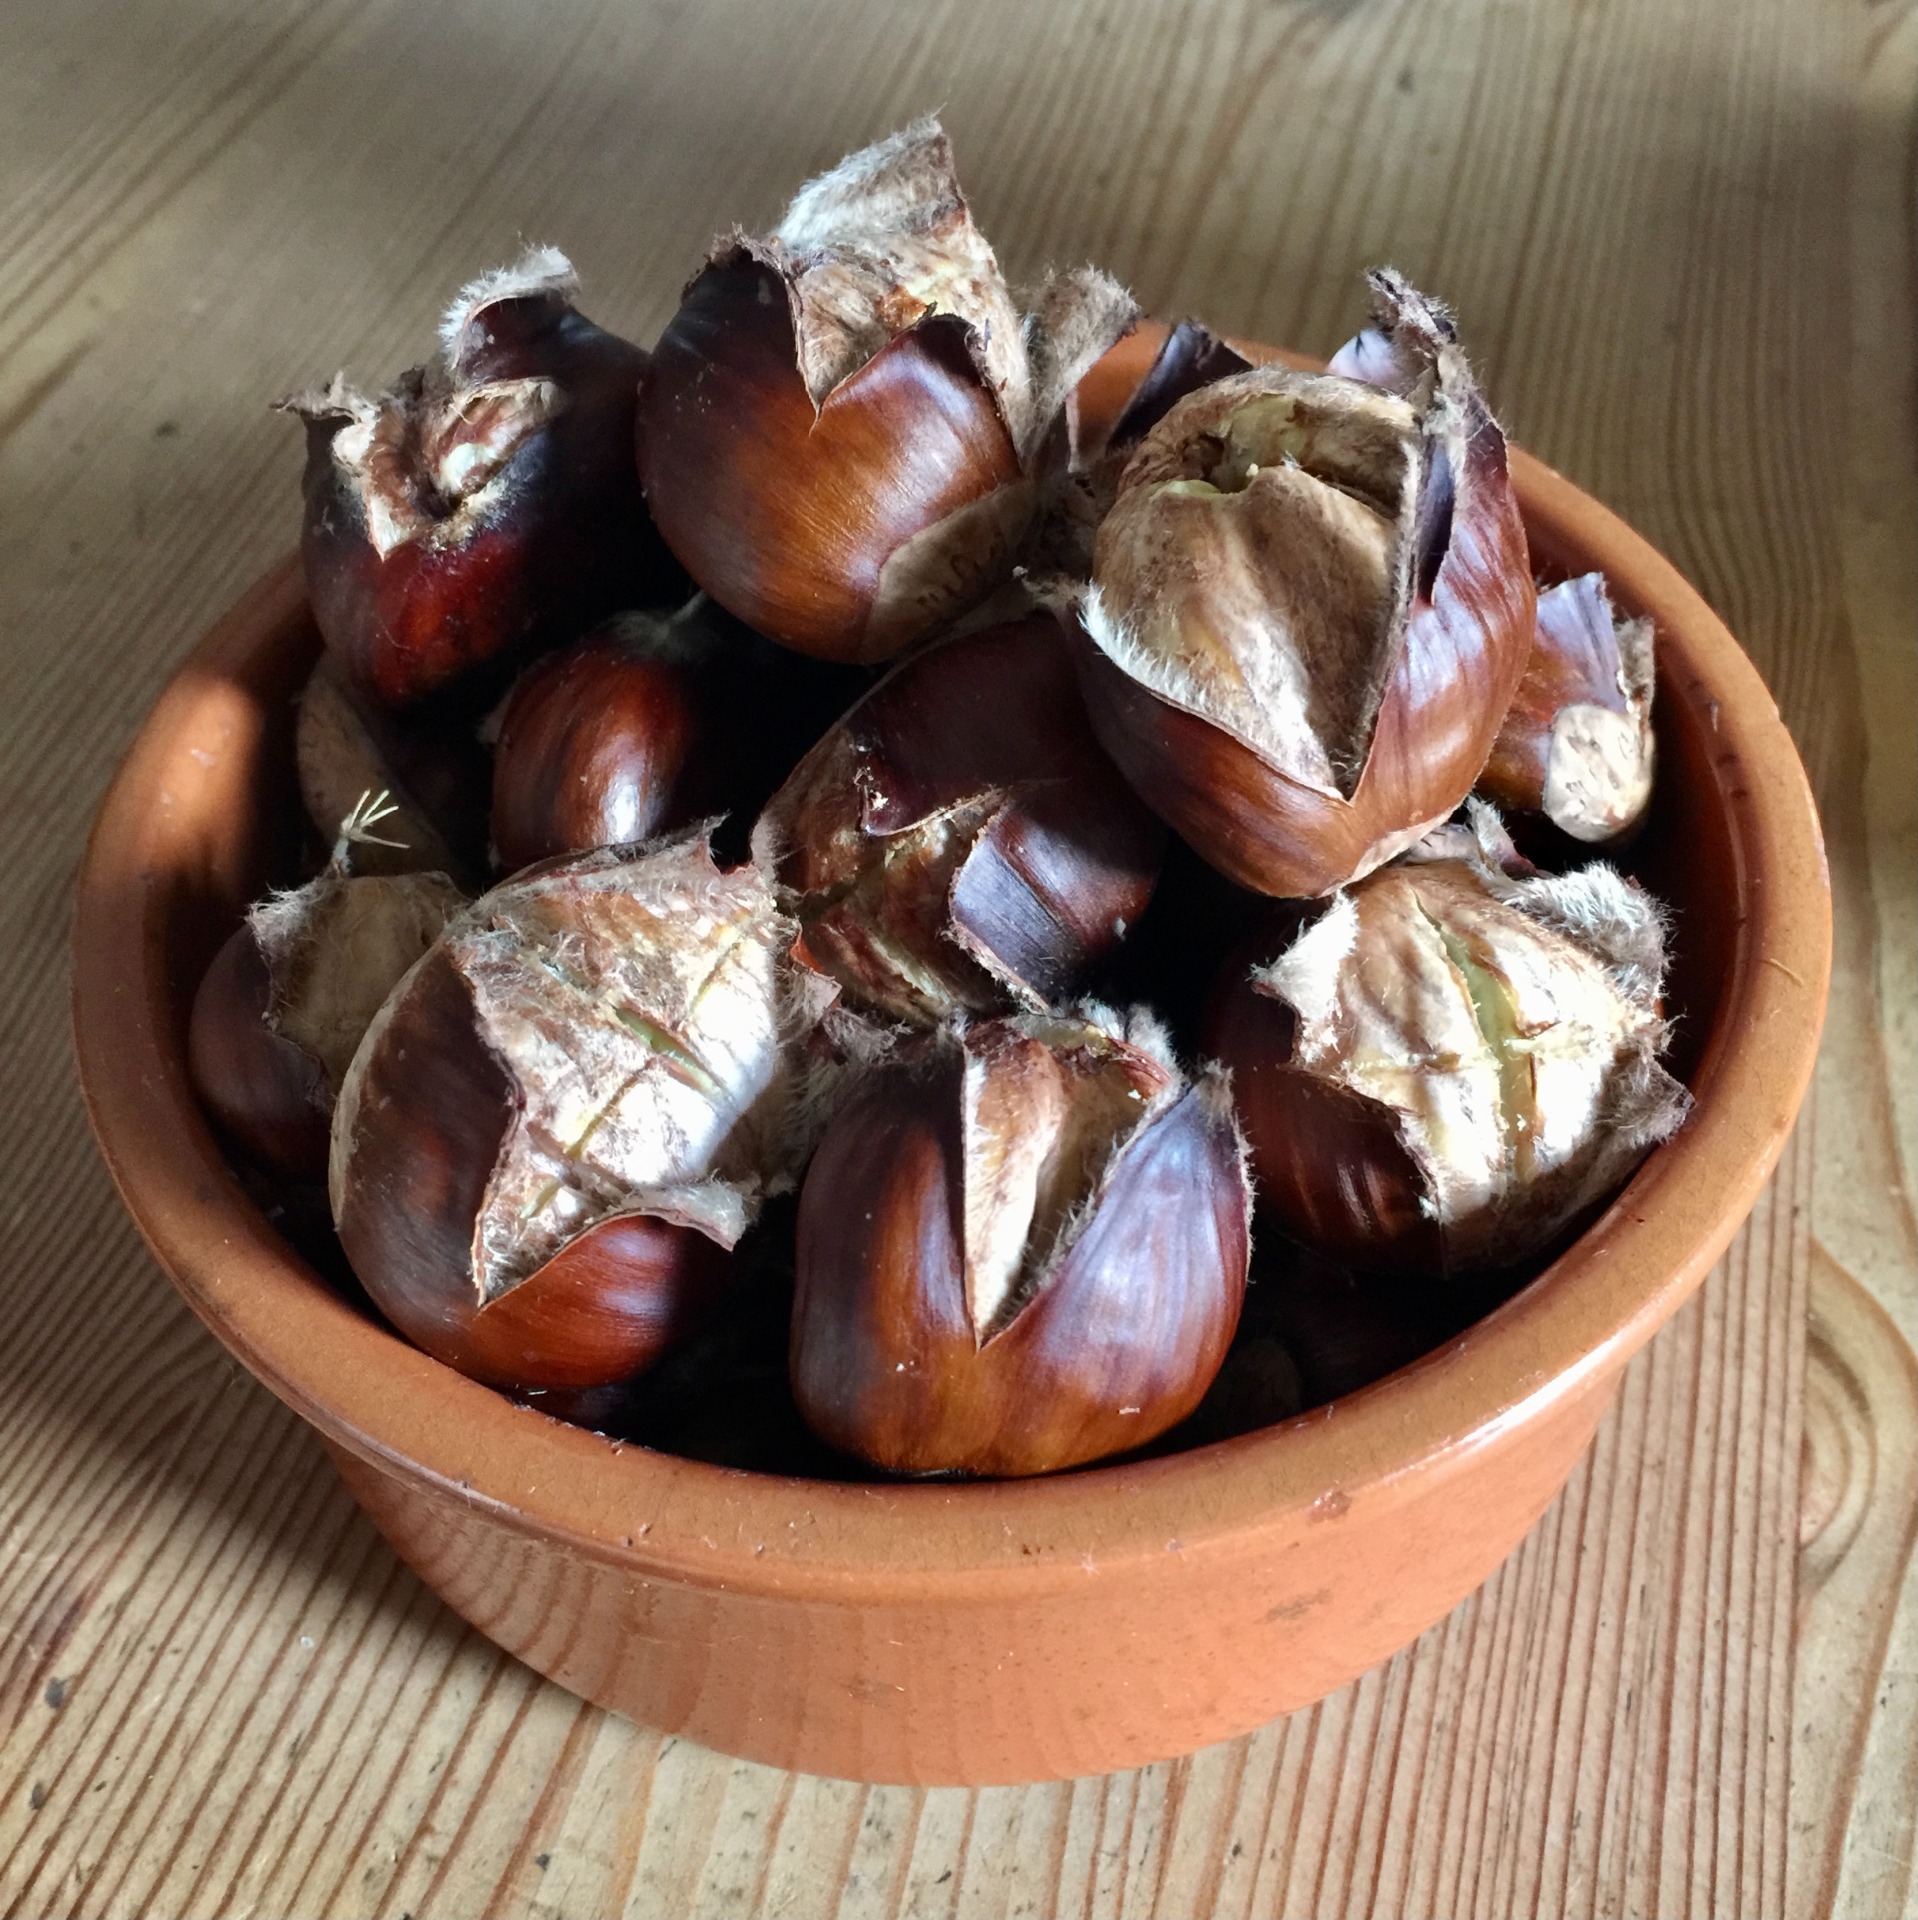
SWEET CHESTNUTS ROASTED!
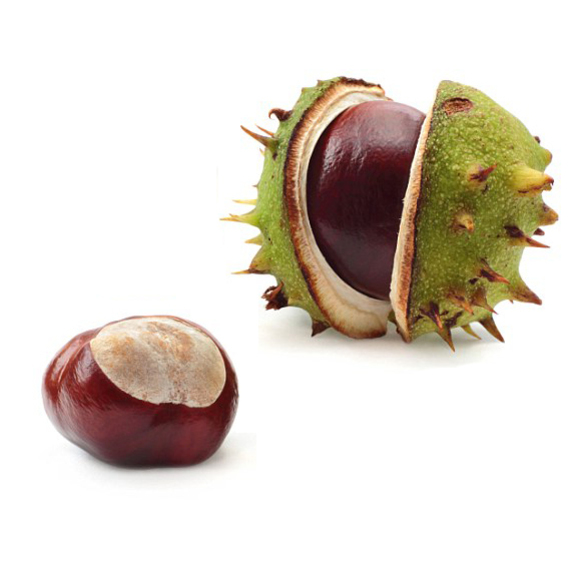
HORSE CHESTNUTS CONKERS!
STEP 1
GATHER YOUR SEEDS!
1. Before you do anything, you'll want to make sure you have a pair of gloves as Sweet Chestnuts are housed in a prickly hair shell. Get out and collect the fallen seeds from under the Sweet Chestnut tree. You will need to open the green shells which are prickly! Pick the plumpest and biggest you can find. DO NOT TRY THIS WITH HORSE CHESTNUTS! THEY ARE NOT EDIBLE!!
STEP 2
PREP!
2. Remove the Chestnuts from their green prickly case if you haven't already and disgard the green part. Wash your foraged chestnuts under cold water and ensure the brown skin is not damaged or has any bug holes. Wash away any dirt and then dry.
STEP 3
CHOOSE YOUR SCORE!
3. There are a few ways you can score your Chestnut shell. You can do an X across the side, a ring around the centre like a belt leaving a centimeter unscored, or if you prefer just a semi circle across one side.
STEP 4
SOAK IN THE BATH
4. Soak the scored Chestnuts in a pan of boiling water for a few minutes - if you wish to add a flavour, now is the time - salt, sugar or pepper are popular. We think less is more when it comes to roasted Chestnuts - so don't over do it if this is your first rodeo.
STEP 5
GET ROASTIN'
5. Pat them dry and lay out Chestnuts on a roasting tin scored side up / flat side down. You can do this over an open fire if you have one in a specially designed roasting pan, but the oven does just as good a job! Cook for 30mins in a preheated oven at 200°C or until the skins have split open slightly.
STEP 6
ENJOY!
6. They will be "roasting" hot when you get them out so leave them to cool for 10 mins. You can enjoy these as a snack straight out the oven, on top of a salad, or our favourite, along side a Sunday Roast Dinner!
STEP 1
GATHER YOUR SEEDS!
1. Get outside and collect those Conkers. These will be in hard shells with little spikes all over - not the hairy kind!
STEP 2
DRILL A HOLE
2. Drill a hole directly through the middle of the pale colour on the top of the conker.
STEP 3
THREAD STRING
3. Thread a length of string or a shoe lace thats at least 35-45cm long through the hole and tie a knot a the bottom.
STEP 4
PLAY!
4. The objective of the game is to get your opponents conker off the string. Player one holds their string out at arms length and Player two swings their Conker at opponents. Players gets a second turn if they successfully strike the other Conker or if the conker is missed, the players swap over. The winner is the first to get the other players conker off the string.
CONKER CRAFTS
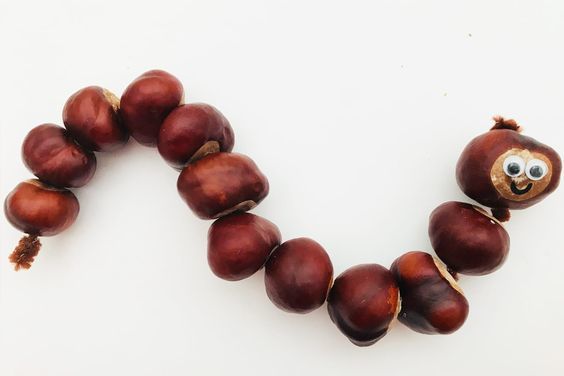
CONKER CATERPILLAR
We love this idea of a Conker Caterpillar/Snake/Worm :) Step by step instructions on the link below
https://masandpas.com/fun-conker-snakes/
All you need is some Horse Chestnuts, Pipe Cleaner or wire and string, a drill, a sharpie and some googly eyes.

ALPHABET CONKERS!
A great way of making learning fun!
https://annakireevaphotography.co.uk/october-half-term-2019-activities/
AUTUMN DIY's & ACTIVITIES
FOR THE ADULTS
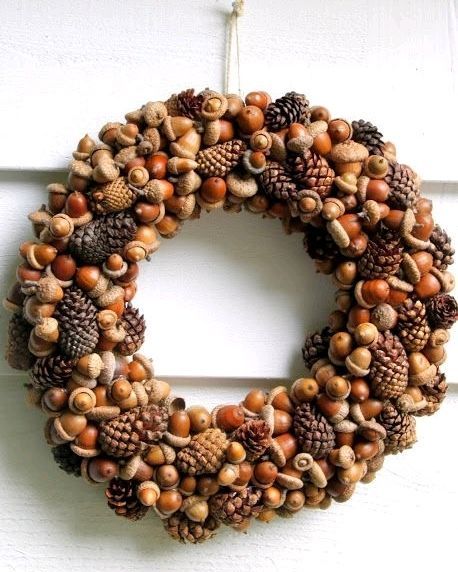
These days, there is a wreath for every season, no need to limit it just for Christmas! We absolutely love autumn, and what better reason to get outside and enjoy the beautiful colours than to go foraging or some Autuminal bits and bobs for a wreath!?
You can really do whatever you fancy which is why we love this idea!
A few ideas of the things you can easily get your hands on this time of year:
Pine cones
Acorns
Chestnuts
Holly
Ivy
Berries from Rowan/Holly
Here's a few we love...
https://www.tillysnest.com/2015/09/gathered-fall-wreath-html/
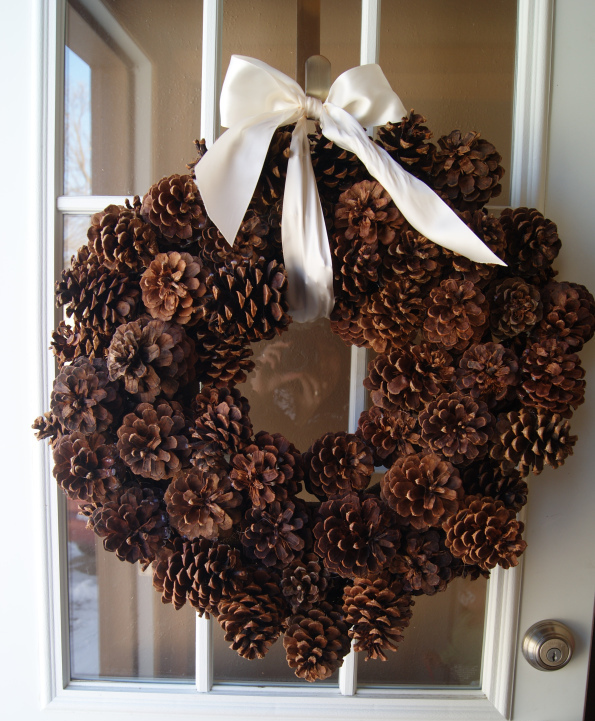
https://abreiden.wordpress.com/2010/12/02/beautiful-pine-cone-wreath/

http://prettylittletruth.com/2018/09/25/diy-couronne-dautomne-en-marrons/

Although the photo is of fake acorns and pine cones, you could easily use real ones!
(https://thehappyhousie.porch.com/easy-diy-acorn-pinecone-garland/)
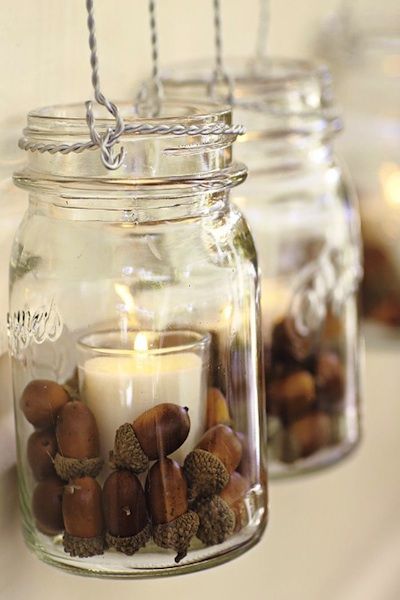
Candle, Mason Jar & Acorns - Autumn in a Jar!!
I put this under the adults section because I tried this at the beginning of COVID Lockdown with with my 4 year old and safe to say, I enjoyed it more!
https://www.thismother.com/leaf-crafts/
FOR THE KIDS
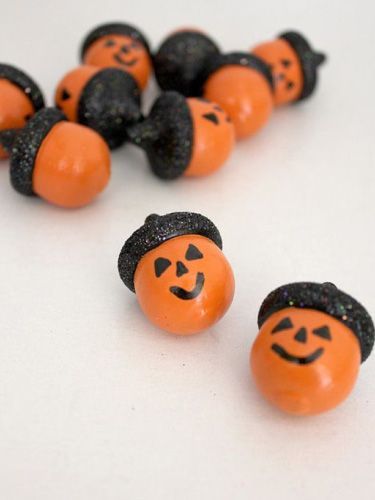
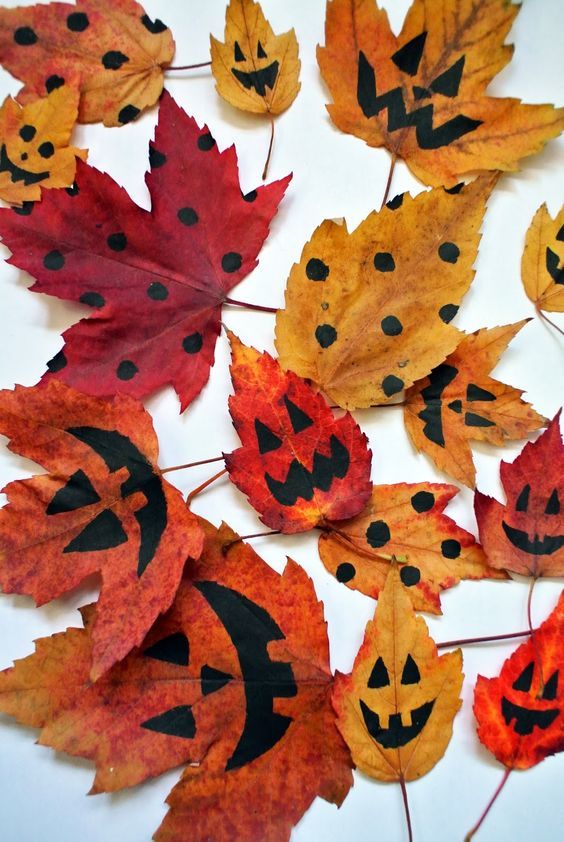
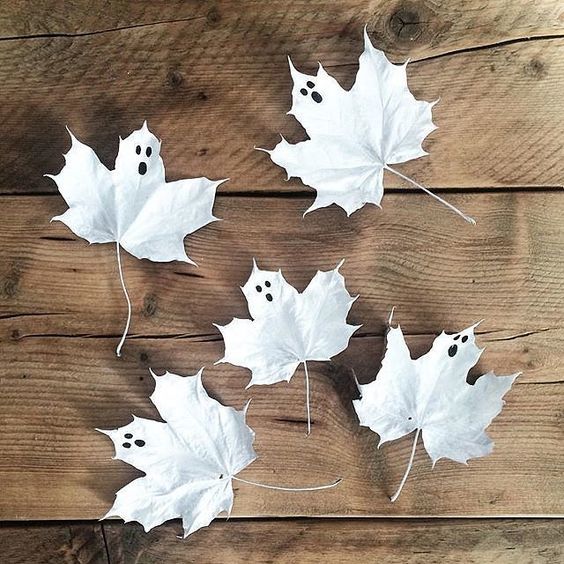
'Tis the season and whilst it may not be the same this year without our usual Trick or Treating - there are lots of fun actitivies that the kids can do to replace the usual traditions. These are fun to decorate and will also make spooky decorations for halloween.
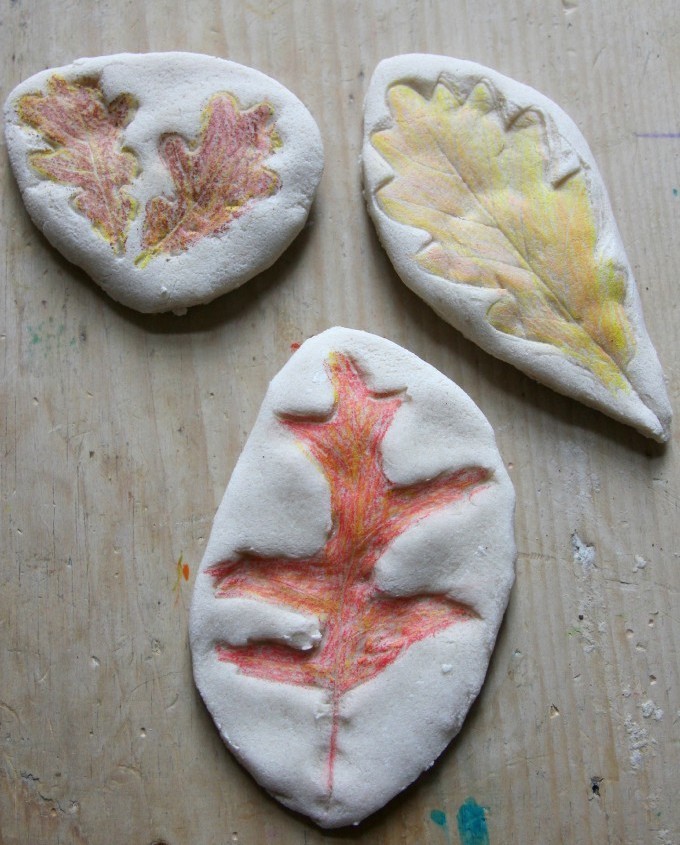
Salt dough and a few different leaves can make an easy activity that keeps kids busy for at least an hour! Once they are cooked, they can colour or paint them. Make a hole before baking and hang them up with string for lovely little autumn decorations or gifts for the family.
https://theimaginationtree.com/coloured-salt-dough-leaf-impressions/
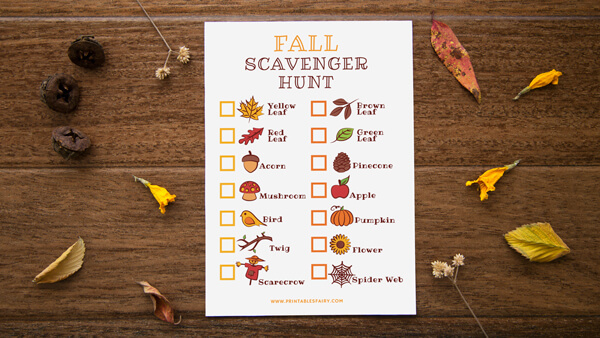
An Autumn scavenger hunt is such a fun family activity and a great excuse to get out of the house and get some fresh air! You can make it a race or do it as a team. There are plenty of printable versions online or simply draw up your own!
Another way to do this is to get an empty egg carton and paint an autumn colour in each section. Then go and hunt down something for each colour. First to fill their carton is the winner!
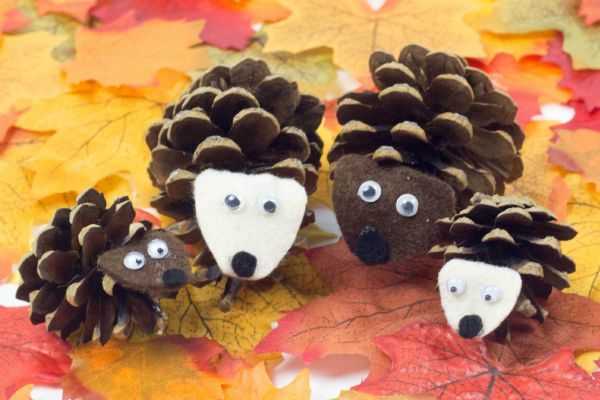
Pine cones have so many possibilities when it comes to crafts, but these little hedgehogs are definitely a firm favourite of ours. Harvest the pine cones and keep them warm and dry for a few days and you will start to see them open up like this.
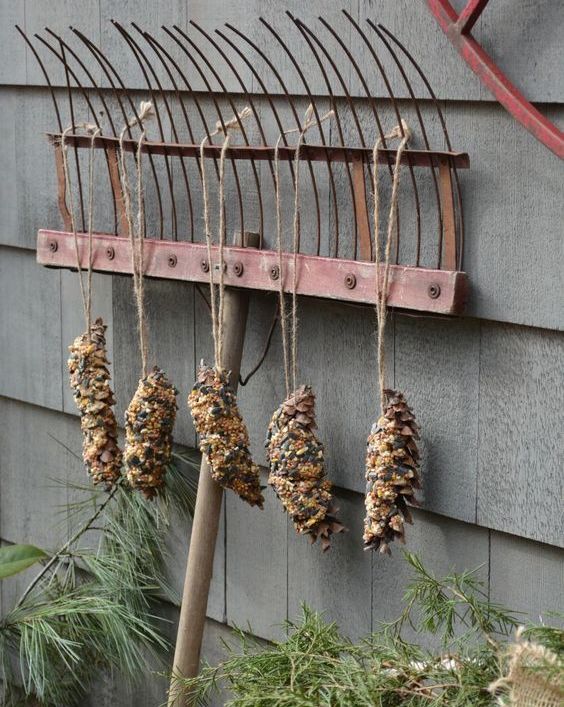
These are so easy and provide so much excitement for the kids when the birds come to feed on them! They are so so easy and "cheep" to make :)
We hope we have inspired some of you to get out there and go foraging in the woodlands and parks. For us, this time of year is the best time to really appreciate nature and what it has to offer. We would love to see some of your own Autumn Crafts and Activities - please do share them on our Facebook or tag us on Instagram.
@acutabovesurrey
AUTUMN ACTIVITIES
Well, Hello Autumn! Where did you creep up on us from?! After a year where staying in became the new norm for us all, there may be a good reason to venture outside this season. You would have noticed, along with all the autumnal toned leaves, is the amount of seeds scattering the grounds. We want to give you some step-by-step guides of some great autumninal activities to keep you busy this month!
PLANTING SEEDS
‘Growing a tree’ is not going to be an overnight job but it is so important for our environment to put back in what we can. Every member of the A Cut Above team are passionate about trees and although part of our job can involve removing an unhealthy or unwanted tree, we want to do all we can to replace these (and more!). Besides benefiting the environment, growing a tree from a seed is great fun and interesting – you get to watch it from the start of its life, which you have given it and who knows the height it will eventually reach. So here are two easy ones that you can try...
BEECH
OAK
STEP 1
GATHER YOUR SEEDS!
Get outside and collect those seeds. Put your gathered seeds in a cup of water. Those that sink are viable, those that float will not germinate.
STEP 2
HELLO COMPOST!
Fill a plant pot (preferably squared) with compost. Ensure the pot has drainage holes in the base. You can also add a few small stones to the bottom of the plant pot to help with water drainage. Leave about a one-inch gap from the compost to the top of the pot.
STEP 3
INTRODUCE THE SEEDS!
Plant the seeds about 2cm deep into the compost. Push these down and cover the seeds with some more compost.
STEP 4
GIVE THEM A DRINK!
Water the plant pot thoroughly making sure all the compost is wet. Be careful not to ‘flood’ the plant pot but enough to give that seed its first thirst quench of life.
STEP 5
GET SHADY!
Location, location, location - place the pot in a shady spot, either in the garden or near a window that does not get much light. Wherever you put it, the spot should not receive constant sunlight. Seeds thrive well between a temperature of 18⁰C and 24⁰C. If outside, you will need to cover the pot with some wire mesh to protect it from hungry birds and squirrels.
STEP 6
MOTHER THAT BABY!
Check on the pot each week, keeping it watered but do not over water it. It will not be long until you see the seedlings start to appear.
STEP 7
RE-ACOMMODATE!
You should be able to judge when the tree will need to be transferred to a bigger pot or straight into the ground. You may notice the roots starting to appear out the drainage holes at the bottom of the pot. This is when it will need to be transferred into somewhere larger and sunnier. Once the tree reaches around 40cm, it is ready for the ground. When transferring the tree to another home, ensure that it is kept well-watered.
More info on this step at https://www.woodlandtrust.org.uk/plant-trees/advice/how-to-plant/
STEP 8
BE PROUD!
You’ve grown a tree! Keep patient and enjoy watching it grow and grow - it could be set for high heights!
STEP 1
GATHER YOUR SEEDS!
Get outside and collect those seeds. Find acorns in good condition that are green or brown and without holes. The caps should come off easily.
STEP 2
HELLO COMPOST!
Fill a plant pot (preferably squared) with compost. Ensure the pot has drainage holes in the base. You can also add a few small stones to the bottom of the plant pot to help with water drainage. Leave about a one-inch gap from the compost to the top of the pot.
STEP 3
INTRODUCE THE SEEDS!
Plant the seeds about 2cm deep into the compost. Push these down and cover the seeds with some more compost.
STEP 4
GIVE THEM A DRINK!
Water the plant pot thoroughly making sure all the compost is wet. Be careful not to ‘flood’ the plant pot but enough to give that seed its first thirst quench of life.
STEP 5
GET SHADY!
Location, location, location - place the pot in a shady spot, either in the garden or near a window that does not get much light. Wherever you put it, the spot should not receive constant sunlight. Seeds thrive well between a temperature of 18⁰C and 24⁰C. If outside, you will need to cover the pot with some wire mesh to protect it from hungry birds and squirrels.
STEP 6
MOTHER THAT BABY!
Check on the pot each week, keeping it watered but do not over water it. Be patient, it could be as late as Spring.
STEP 7
RE-ACOMMODATE!
You should be able to judge when the tree will need to be transferred to a bigger pot or straight into the ground. You may notice the roots starting to appear out the drainage holes at the bottom of the pot. This is when it will need to be transferred into somewhere larger and sunnier. Once the tree reaches around 40cm, it is ready for the ground. When transferring the tree to another home, ensure that it is kept well-watered.
More info on this step at https://www.woodlandtrust.org.uk/plant-trees/advice/how-to-plant/
STEP 8
BE PROUD!
You’ve grown a tree! Keep patient and enjoy watching it grow and grow - it could be set for high heights!
MAD ABOUT CHESTNUTS...
SWEET CHESTNUTS ROASTED!
HORSE CHESTNUTS CONKERS!
STEP 1
GATHER YOUR SEEDS!
1. Before you do anything, you'll want to make sure you have a pair of gloves as Sweet Chestnuts are housed in a prickly hair shell. Get out and collect the fallen seeds from under the Sweet Chestnut tree. You will need to open the green shells which are prickly! Pick the plumpest and biggest you can find. DO NOT TRY THIS WITH HORSE CHESTNUTS! THEY ARE NOT EDIBLE!!
STEP 2
PREP!
2. Remove the Chestnuts from their green prickly case if you haven't already and disgard the green part. Wash your foraged chestnuts under cold water and ensure the brown skin is not damaged or has any bug holes. Wash away any dirt and then dry.
STEP 3
CHOOSE YOUR SCORE!
3. There are a few ways you can score your Chestnut shell. You can do an X across the side, a ring around the centre like a belt leaving a centimeter unscored, or if you prefer just a semi circle across one side.
STEP 4
SOAK IN THE BATH
4. Soak the scored Chestnuts in a pan of boiling water for a few minutes - if you wish to add a flavour, now is the time - salt, sugar or pepper are popular. We think less is more when it comes to roasted Chestnuts - so don't over do it if this is your first rodeo.
STEP 5
GET ROASTIN'
5. Pat them dry and lay out Chestnuts on a roasting tin scored side up / flat side down. You can do this over an open fire if you have one in a specially designed roasting pan, but the oven does just as good a job! Cook for 30mins in a preheated oven at 200°C or until the skins have split open slightly.
STEP 6
ENJOY!
6. They will be "roasting" hot when you get them out so leave them to cool for 10 mins. You can enjoy these as a snack straight out the oven, on top of a salad, or our favourite, along side a Sunday Roast Dinner!
STEP 1
GATHER YOUR SEEDS!
1. Get outside and collect those Conkers. These will be in hard shells with little spikes all over - not the hairy kind!
STEP 2
DRILL A HOLE
2. Drill a hole directly through the middle of the pale colour on the top of the conker.
STEP 3
THREAD STRING
3. Thread a length of string or a shoe lace thats at least 35-45cm long through the hole and tie a knot a the bottom.
STEP 4
PLAY!
4. The objective of the game is to get your opponents conker off the string. Player one holds their string out at arms length and Player two swings their Conker at opponents. Players gets a second turn if they successfully strike the other Conker or if the conker is missed, the players swap over. The winner is the first to get the other players conker off the string.
CONKER CRAFTS
CONKER CATERPILLAR
We love this idea of a Conker Caterpillar/Snake/Worm :) Step by step instructions on the link below
https://masandpas.com/fun-conker-snakes/
All you need is some Horse Chestnuts, Pipe Cleaner or wire and string, a drill, a sharpie and some googly eyes.
ALPHABET CONKERS!
A great way of making learning fun!
https://annakireevaphotography.co.uk/october-half-term-2019-activities/
AUTUMN DIY's & ACTIVITIES
FOR THE ADULTS
These days, there is a wreath for every season, no need to limit it just for Christmas! We absolutely love autumn, and what better reason to get outside and enjoy the beautiful colours than to go foraging or some Autuminal bits and bobs for a wreath!?
You can really do whatever you fancy which is why we love this idea!
A few ideas of the things you can easily get your hands on this time of year:
Pine cones
Acorns
Chestnuts
Holly
Ivy
Berries from Rowan/Holly
Here's a few we love...
https://www.tillysnest.com/2015/09/gathered-fall-wreath-html/
https://abreiden.wordpress.com/2010/12/02/beautiful-pine-cone-wreath/
http://prettylittletruth.com/2018/09/25/diy-couronne-dautomne-en-marrons/
Although the photo is of fake acorns and pine cones, you could easily use real ones! (https://thehappyhousie.porch.com/easy-diy-acorn-pinecone-garland/)
Candle, Mason Jar & Acorns - Autumn in a Jar!!
I put this under the adults section because I tried this at the beginning of COVID Lockdown with with my 4 year old and safe to say, I enjoyed it more!
https://www.thismother.com/leaf-crafts/
FOR THE KIDS
'Tis the season and whilst it may not be the same this year without our usual Trick or Treating - there are lots of fun actitivies that the kids can do to replace the usual traditions. These are fun to decorate and will also make spooky decorations for halloween.
Salt dough and a few different leaves can make an easy activity that keeps kids busy for at least an hour! Once they are cooked, they can colour or paint them. Make a hole before baking and hang them up with string for lovely little autumn decorations or gifts for the family.
https://theimaginationtree.com/coloured-salt-dough-leaf-impressions/
An Autumn scavenger hunt is such a fun family activity and a great excuse to get out of the house and get some fresh air! You can make it a race or do it as a team. There are plenty of printable versions online or simply draw up your own!
Another way to do this is to get an empty egg carton and paint an autumn colour in each section. Then go and hunt down something for each colour. First to fill their carton is the winner!
Pine cones have so many possibilities when it comes to crafts, but these little hedgehogs are definitely a firm favourite of ours. Harvest the pine cones and keep them warm and dry for a few days and you will start to see them open up like this.
These are so easy and provide so much excitement for the kids when the birds come to feed on them! They are so so easy and "cheep" to make :)
We hope we have inspired some of you to get out there and go foraging in the woodlands and parks. For us, this time of year is the best time to really appreciate nature and what it has to offer. We would love to see some of your own Autumn Crafts and Activities - please do share them on our Facebook or tag us on Instagram.
@acutabovesurrey
Share this post: